
The hardest part of any new software is the first day. You sign up, see an empty screen and wonder where to start. SchoolBee guides you through setup one step at a time and shows how ready your school is as you go.
Here is the whole setup, from creating your account to a fully planned school calendar. Most schools finish in about ten minutes.
In this guide
Step 1: Create your account and start the free trial
Go to SchoolBee and click Get Started Free. Enter your name, school name, email, phone and a password, or continue with Google. Your school starts on a free trial with every feature switched on, so you can try everything before choosing a plan.
Step 2: Follow the setup steps
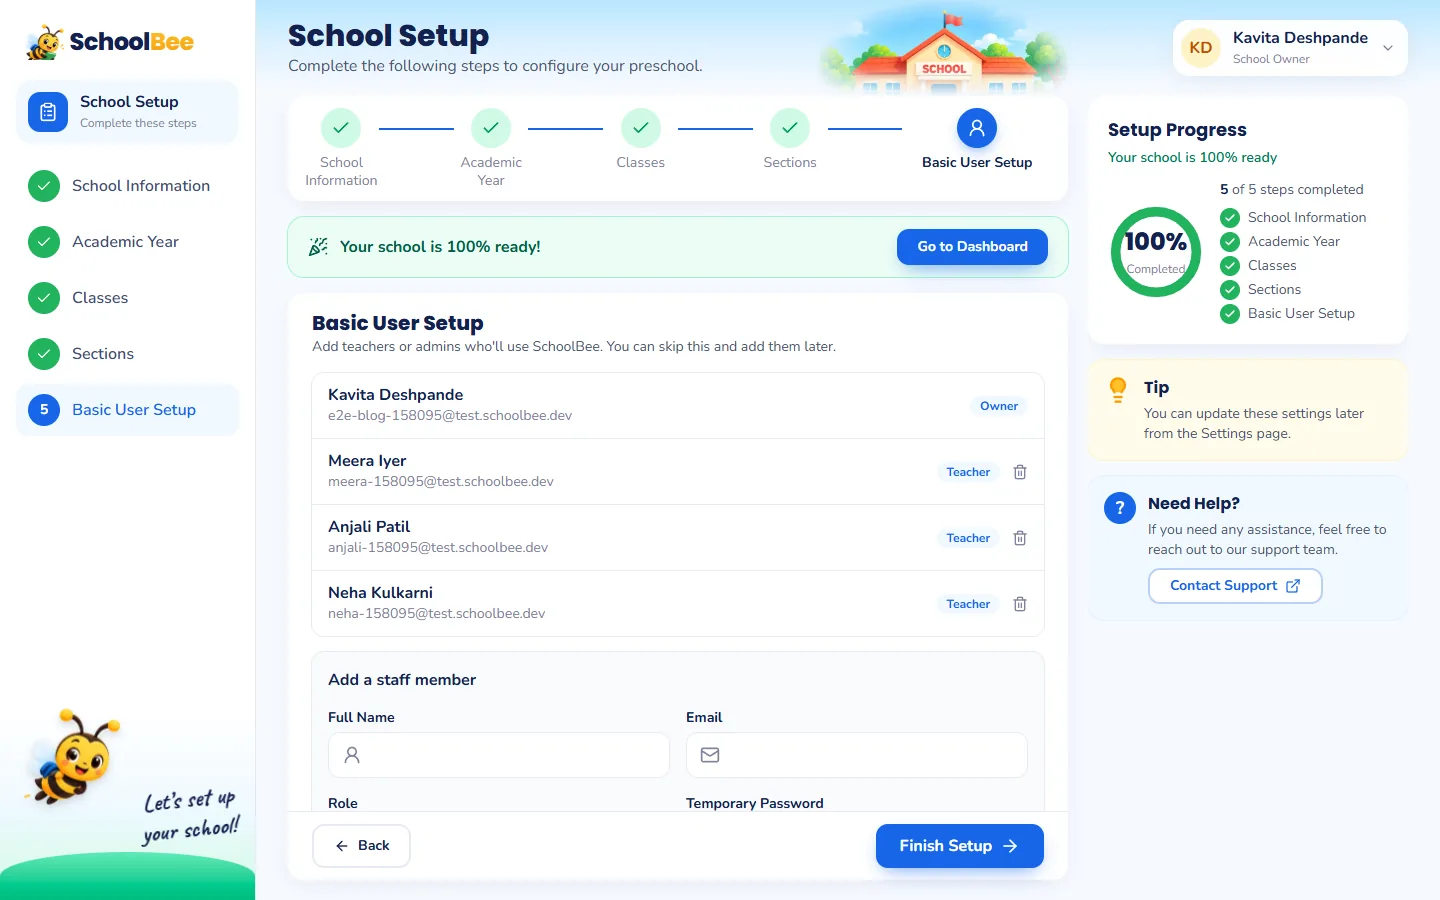
The School Setup page lists five steps and a progress bar ("Your school is 60% ready"):
- School information: name, address, phone, email and the principal’s name. These appear on certificates and reports.
- Academic year: for example 2026-27, from June to April.
- Classes: Play Group, Nursery, LKG, UKG, or whatever you call them.
- Sections: split big classes into sections such as LKG A and LKG B.
- Staff: add teachers and office staff who need a login.
Step 3: Assign class teachers
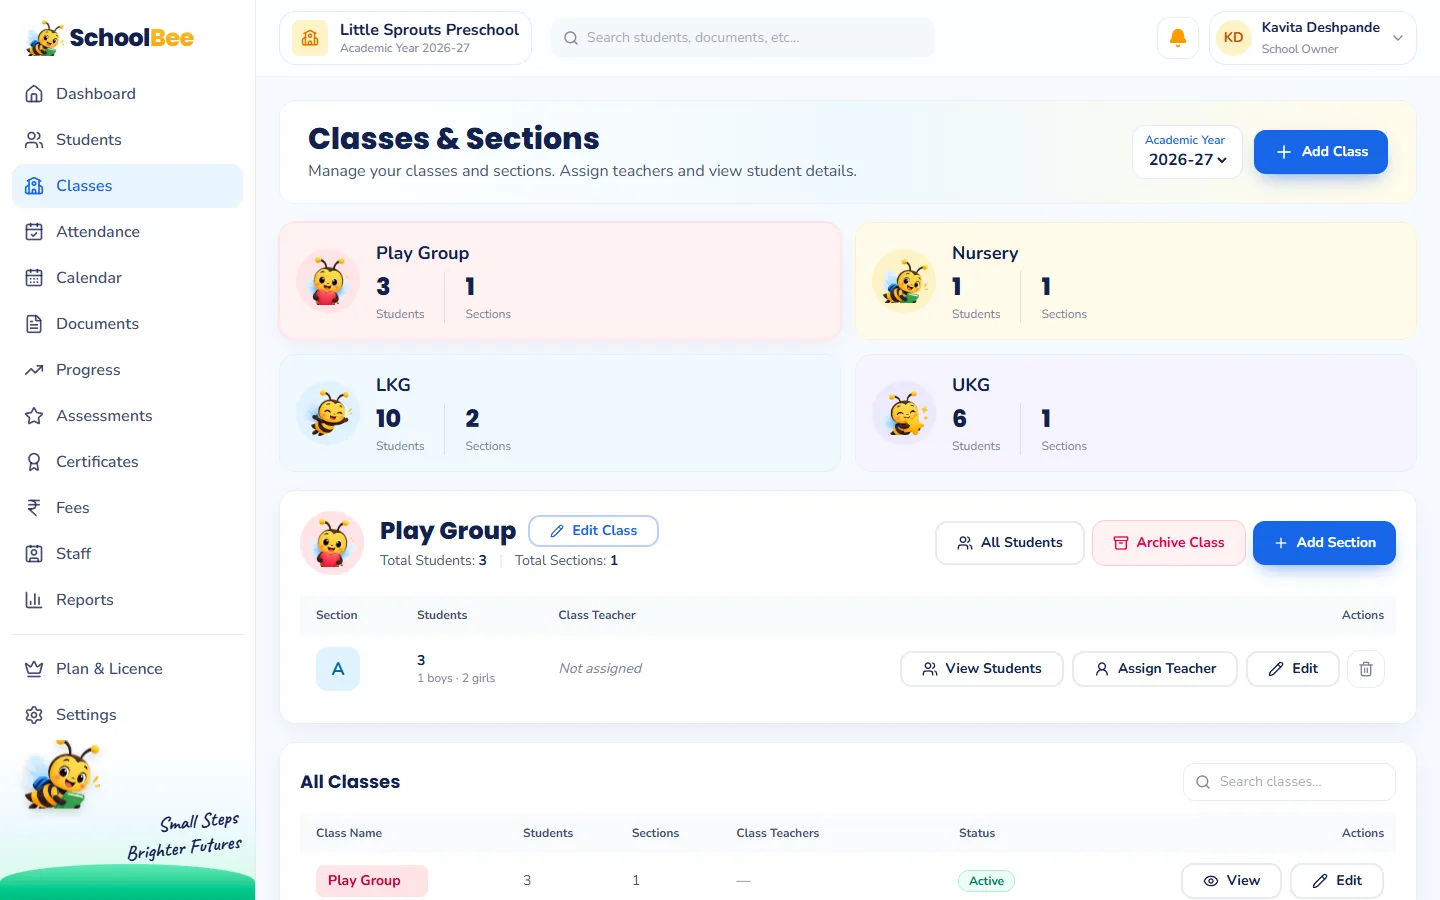
Open Classes to see every class and section with its student count, then assign a class teacher to each section. Class teachers automatically get their sections in attendance, progress and assessments. Learn more in teacher and staff management.
Step 4: A few settings worth doing on day one
- Logo, signature and stamp: upload them once for certificates and report cards.
- Weekly off days: usually Sunday, sometimes Saturday too. Used by attendance and payroll.
- Attendance lock: how many days teachers can still change a register (7 by default).
- Document types: which student documents are required.
- Parent login: your own default password for the parent portal.
Step 5: Plan the year on the school calendar
Add holidays, special days, trips and annual events to the School Calendar, for the whole school or for specific classes. Diwali vacation, Children’s Day, a farm visit for UKG, Annual Day rehearsals: everything in one place. Student and staff birthdays appear automatically.
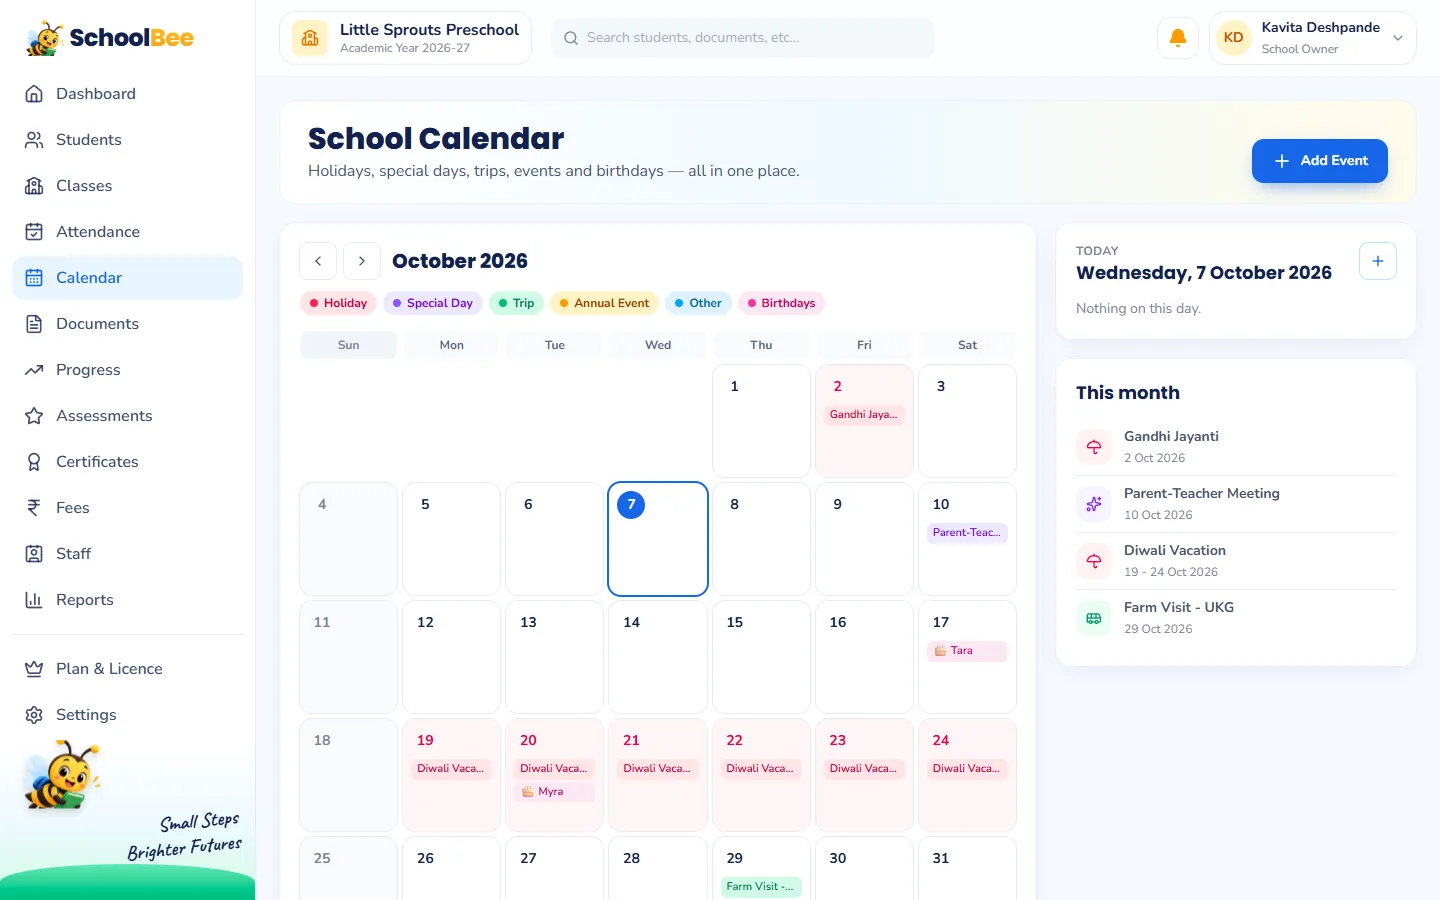
- When you add or change an event you can notify all staff: a bell notification and a pop-up after they log in.
- Whole-school holidays are used to work out working days for payroll.
- Parents see the next 30 days of events for their child’s class in the parent portal.
Step 6: Add students and start using it
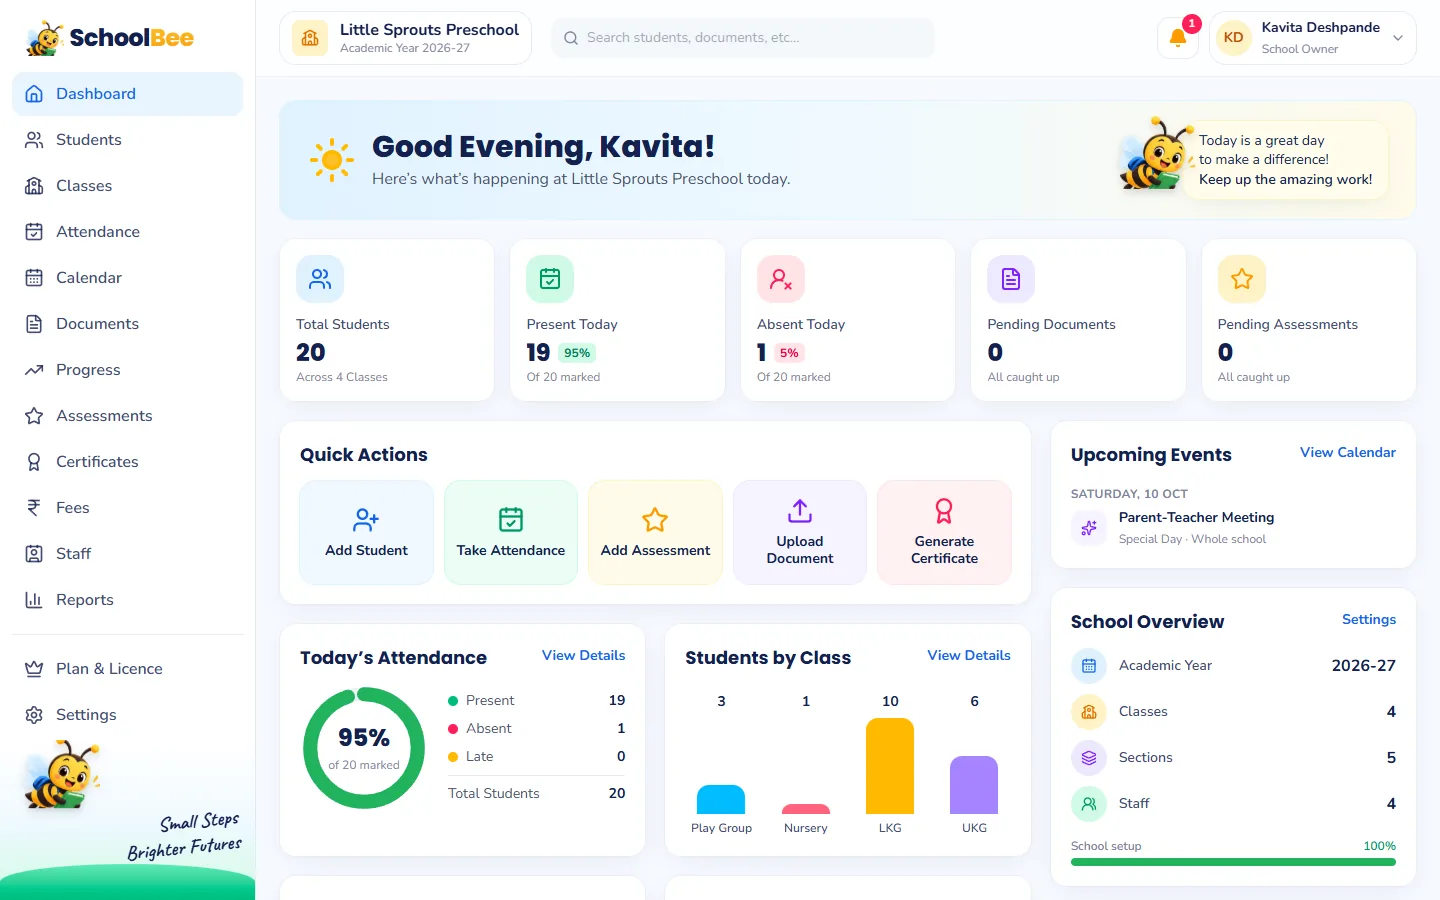
Now enroll your students, one by one or by importing your Excel list. Then set up fees, take your first attendance and try progress tracking. The dashboard will start filling up straight away.
Frequently asked questions
How long does it take to set up SchoolBee?
Most schools finish setup in about ten minutes. Adding students takes longer only if you type them in one by one; importing from Excel is quicker.
Do I need technical knowledge?
No. Setup is a guided list of steps, and every screen explains what to do next.
Can I change classes and sections later?
Yes. Add, rename or archive classes and sections from the Classes page at any time.
Can the calendar notify my teachers?
Yes. When you add or change an event you can notify all staff with a bell notification and a pop-up after login.
What happens when the free trial ends?
Choose a plan from Plan & Licence and pay online by UPI, card or net banking. Your data stays as it is.